The Interior Design Blog
Sewing Your Curtains: A Complete Guide to DIY Window Treatments
Making your curtains sounds intimidating, but it’s a satisfying Do It Yourself project. You could tailor fabric, colour, length, and style with just a little sewing experience and some direction. This is an inexpensive tip to improve your home décor. Whether you’re looking for elegant drapes for your living room or light sheers for your bedroom, making your curtains will provide you with homemade window treatments to your taste.
This guide includes tips on everything from choosing fabric to measuring, sewing and hanging. Whether you’re a beginner or an experienced crafter, you’ll find helpful tips to help you succeed.
Why Make Your Curtains?
Cost-Effective and Budget-Friendly
Curtains can be pricey, especially if custom-made. By choosing DIY curtains, you save money without sacrificing style or quality. Often, fabric and basic supplies are much cheaper than store-bought options.
Fully Customisable
When you sew your curtains, you can choose:
- Fabric type – cotton, linen, velvet, etc.
- Pattern and colour – match your home decor perfectly.
- Length and width – ensure the right fit.
- Lining options – add blackout lining for bedrooms or leave unlined for airy rooms.
Skill-Building
Sewing curtains is a great beginner project. It builds confidence and helps develop basic sewing skills. Once you master curtain-making, you’ll feel ready to tackle more complicated home decor or clothing projects.
Choosing the Right Fabric
Fabric Types and Their Functions
Your fabric choice affects both the look and function of your curtains. Here are some popular options:
- Cotton: Lightweight, easy to use, and great for casual spaces like kitchens.
- Linen: Breathable and natural, perfect for a relaxed, elegant vibe.
- Velvet: Heavy and luxurious, ideal for formal rooms or insulation.
- Sheer fabrics like voile or chiffon are perfect for natural light and privacy.
Consider the Room
- Living Rooms: Look for decorative fabrics like damask or jacquard.
- Bedrooms: Thicker, lined fabrics help control light.
- Kitchens: Choose easy-to-clean fabrics that handle humidity for kitchens.
Durability and Maintenance
Before choosing, check if the fabric is:
- Machine washable or dry-clean only.
- Prone to shrinking or wrinkling.
- UV-resistant if in direct sunlight.
Measuring and Cutting: Precision Matters

Accurate measurements are key to ensuring your curtains fit well and hang nicely.
How to Measure
- Width:
- Measure the window’s width and multiply by 1.5 to 2 for fullness.
- Length:
- Decide if you want the curtains to hover, kiss, or pool on the floor.
- Measure from the curtain rod to your desired endpoint.
Add Seam and Hem Allowances
- Add at least 5 cm on each side for seams.
- Add 15–20 cm at the bottom for a deep hem.
- Include allowance at the top for your curtain heading style (rod pocket, tabs, or rings).
Cutting Tips
- Use sharp fabric scissors.
- Cut on a large, flat surface.
- Double-check measurements before cutting.
Preparing to Sew: Tools and Techniques
Essential Tools
- Sewing machine
- Iron and ironing board
- Pins or fabric clips
- Measuring tape or ruler
- Fabric marking chalk or pencil
Ironing is Key
Always iron your fabric before sewing. This removes creases that can affect measurements and ensures neat hems.
Practice on Scraps
If you’re new to sewing, practice on scraps first. This helps you adjust machine settings and build confidence.
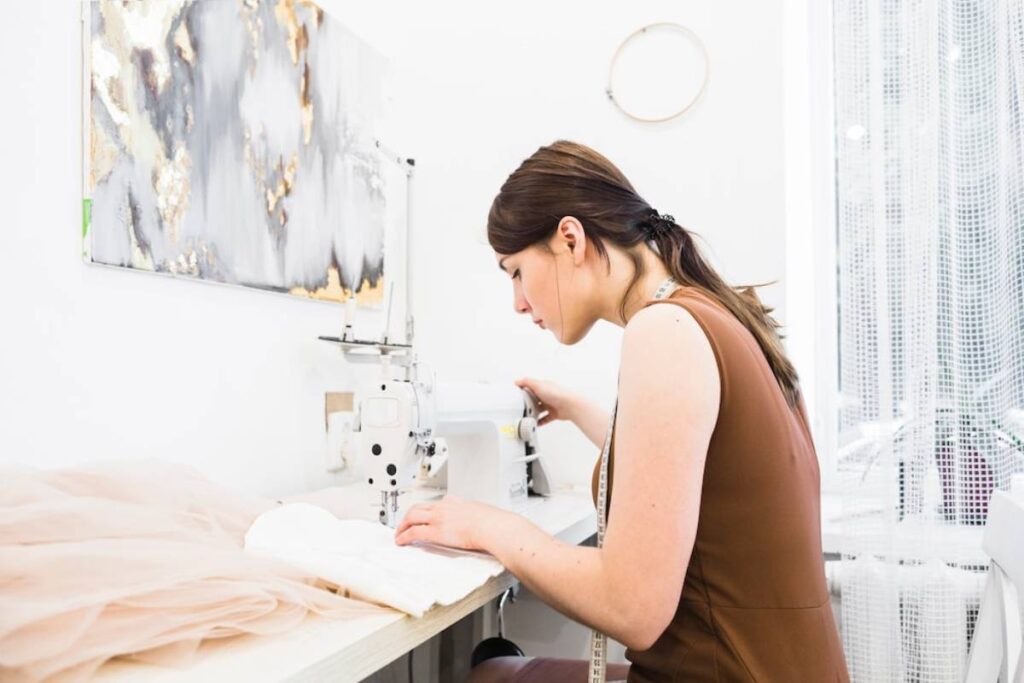
Sewing Your Curtains: Step-by-Step Process
Step 1: Finish the Edges
- Start by hemming the sides: Fold over the edge 1 cm, press, then fold again 2.5 cm and sew down.
- Repeat for the other side.
Step 2: Sew the Bottom Hem
- Fold the fabric 10 cm, press, then fold up again and stitch across the fold.
- A deeper hem helps the curtains hang well and adds weight.
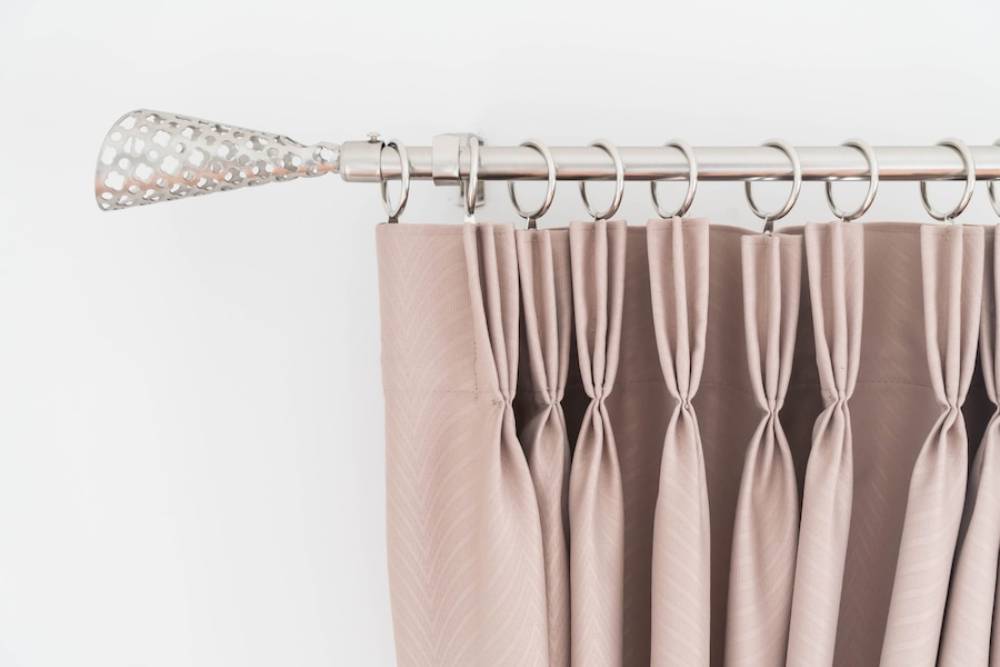
Step 3: Create the Top Header
Choose a header style for the curtain top:
- Rod Pocket – A simple tube for the rod.
- Tab Top – Loops sewn onto the top.
- Grommets or Eyelets – Metal rings inserted into the fabric.
Follow the instructions for your chosen style. Rod pockets are great for beginners; eyelets offer a professional finish.
Adding Linings and Embellishments
Why Line Your Curtains?
The lining adds weight, insulation, and privacy. Types include:
- Blackout lining: Blocks all light—ideal for bedrooms.
- Thermal lining: Retains heat in winter.
- Standard polycotton: Adds structure without bulk.
Sew the lining to the inside of the curtain panel, tacking it down at the top and hemming it separately.
Personalise with Embellishments
Get creative with:
- Decorative trims or tassels.
- Contrasting fabric borders.
- Tie-backs are made from matching or complementary fabric.
These additions make your personalised curtains feel special and unique.
Hanging Your Homemade Curtains
Curtain Rods and Fixings
Choose rods that match your decor and can support the curtain weight. If installing in drywall, use anchors for stability.
Curtain Placement Tips
- Mount rods higher than the window frame for height.
- Extend rods wider than the window to let light in.
Styling
Once your curtains are up, arrange folds or pleats evenly. For a tailored look, use tiebacks or weights.
Common Questions
Do I need a sewing machine to make curtains?
You can hand-sew curtains, but a sewing machine speeds up the process and gives stronger seams. It’s worth it for future home projects.
Can I make curtains without lining?
Yes. Unlined curtains are delicate if you want a lightweight look or privacy isn’t a concern.
What’s the best fabric for beginner curtain makers?
Cotton or polycotton blends are forgiving, easy to sew, and readily available—ideal for beginners.
How long does it take to sew a pair of curtains?
Beginners may take an entire afternoon for one pair. As you gain experience, it becomes quicker.
Bringing Your DIY Vision to Life

It is a smart process that marries function with creativity. From selecting fabric to adding final touches, each step allows you to create a space that might be just for you. Whether you want light sheers for summer or thick drapes for winter, homemade window treatments can add character and a custom fit.
This project is both a money saver and a rewarding accomplishment! Each stitch reflects your hard work and creativity. So take out your fabric, dust off your sewing machine, and use your imagination!
Ready to transform your space? Start your DIY curtains project today and enjoy the joy of handmade home decor!


YOU MAY LIKE